静的IPの設定だけでもアプリケーションは動作するのですが、ドメインを設定することで数値だけのわかりにくいサイトに名前をつけることができます。
お店を呼ぶ時も、東京都品川区1-1-1とは言わずに、〇〇店というのと同じ感じです。
SSLはブラウザとサーバー間の通信を暗号化してくれるため、設定していきましょう。
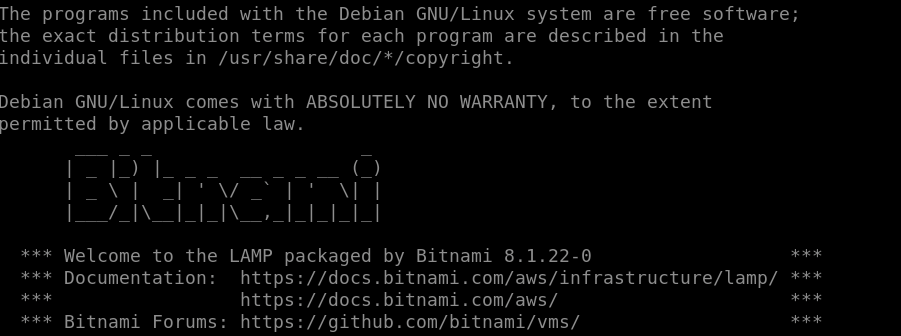
LightSailはデフォルトでBitnamiで設定されているため、bncert-toolを使用して設定をしていきます。
サブドメインの追加・設定
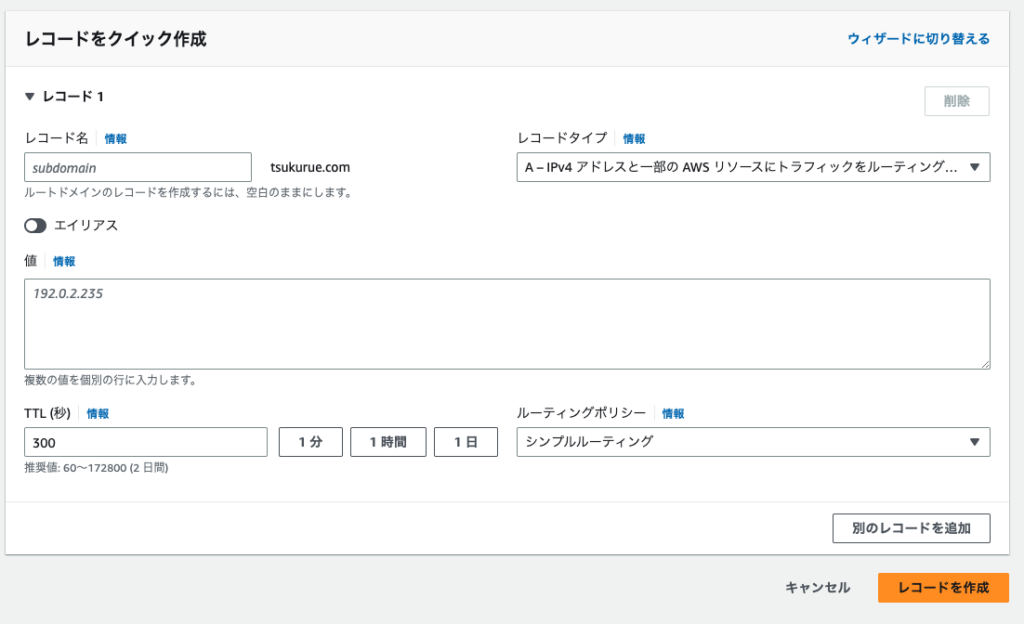
今回は、Route53で既存ドメインを使い、サブドメインの追加設定をします。
Route53のページから該当のドメインを選択します。
右下の「レコードを作成」をクリックします。

「レコード名」にサブドメインとなる名称を入力します。
「値」にサブドメインを定義するサーバーのIPアドレスを入力します。
入力できたら、「レコードを作成」をクリックします。

しばらくするとDNSサーバーに伝達され、サブドメインにアクセスできるようになります。

BitnamiのSSL化
Lightsailでは、Bitnamiのbncert-toolを使用して設定します。
ツールを実行します。
$ sudo /opt/bitnami/bncert-toolDomain list[]: にSSL化するサブドメインを入力します。
例えば、「<sub-domain>.tsukurue.com」といった形です。
入力後、エンターで次へ進みます。
----------------------------------------------------------------------------
Welcome to the Bitnami HTTPS Configuration tool.

----------------------------------------------------------------------------
Domains

Please provide a valid space-separated list of domains for which you wish to
configure your web server.

Domain list []:
マルチドメイン対応の有無を聞かれるので、nを入力します。
nを入力後、「Press [Enter] to continue:」が表示されます。
エンターで次へ進みます。
The following domains were not included: www.combination-search.tsukurue.com. Do you want t
o add them? [Y/n]: n

Warning: No www domains (e.g. www.example.com) or non-www domains (e.g.
www.example.com) have been provided, so the following redirections will be
disabled: non-www to www, www to non-www.
Press [Enter] to continue:
http to https のリダイレクトを聞かれるので、Yを入力します。
----------------------------------------------------------------------------
Enable/disable redirections

Please select the redirections you wish to enable or disable on your Bitnami
installation.

Enable HTTP to HTTPS redirection [Y/n]:
変更を反映してもOKか聞かれるので、Yを入力します。
----------------------------------------------------------------------------
Changes to perform

The following changes will be performed to your Bitnami installation:

1. Stop web server
2. Configure web server to use a free Let's Encrypt certificate for the domains:
combination-search.tsukurue.com
3. Configure a cron job to automatically renew the certificate each month
4. Configure web server name to: combination-search.tsukurue.com
5. Enable HTTP to HTTPS redirection (example: redirect
http://combination-search.tsukurue.com to
https://combination-search.tsukurue.com)
6. Start web server once all changes have been performed


Do you agree to these changes? [Y/n]:
Let’s Encryptに関連づける有効なメールアドレスを入力します。
----------------------------------------------------------------------------
Create a free HTTPS certificate with Let's Encrypt

Please provide a valid e-mail address for which to associate your Let's Encrypt
certificate.

Domain list: <sub-domain>.tsukurue.com

Server name: <sub-domain>.tsukurue.com

E-mail address []:
Subscriver に賛成したら、Yを入力します。
The Let's Encrypt Subscriber Agreement can be found at:

https://letsencrypt.org/documents/LE-SA-v1.3-September-21-2022.pdf

Do you agree to the Let's Encrypt Subscriber Agreement? [Y/n]:
Successが表示されたら、SSL化の完了です。
エンターで終了します。
----------------------------------------------------------------------------

Performing changes to your installation

The Bitnami HTTPS Configuration Tool will perform any necessary actions to your
Bitnami installation. This may take some time, please be patient.

----------------------------------------------------------------------------
Success

The Bitnami HTTPS Configuration Tool succeeded in modifying your installation.

The configuration report is shown below.

Backup files:
* /opt/bitnami/apache/conf/httpd.conf.back.202309100101
* /opt/bitnami/apache/conf/bitnami/bitnami.conf.back.202309100101
* /opt/bitnami/apache/conf/bitnami/bitnami-ssl.conf.back.202309100101

Find more details in the log file:

/tmp/bncert-202309100101.log

If you find any issues, please check Bitnami Support forums at:

https://github.com/bitnami/vms

Press [Enter] to continue:
サイトにhttpsでアクセスできていれば完了です。
まとめ
DNSのAレコードを使うと、ドメインの追加料金なく、レコード追加だけでサブドメインを追加できて簡易な方法でした。
Let’s EncryptのSSLをBitnamiで設定すると、自動的にcronも設定してくれます。
自動更新もこれで安心ですね。
$ crontab -l


